kenmore sewing machine 12 stitch manual
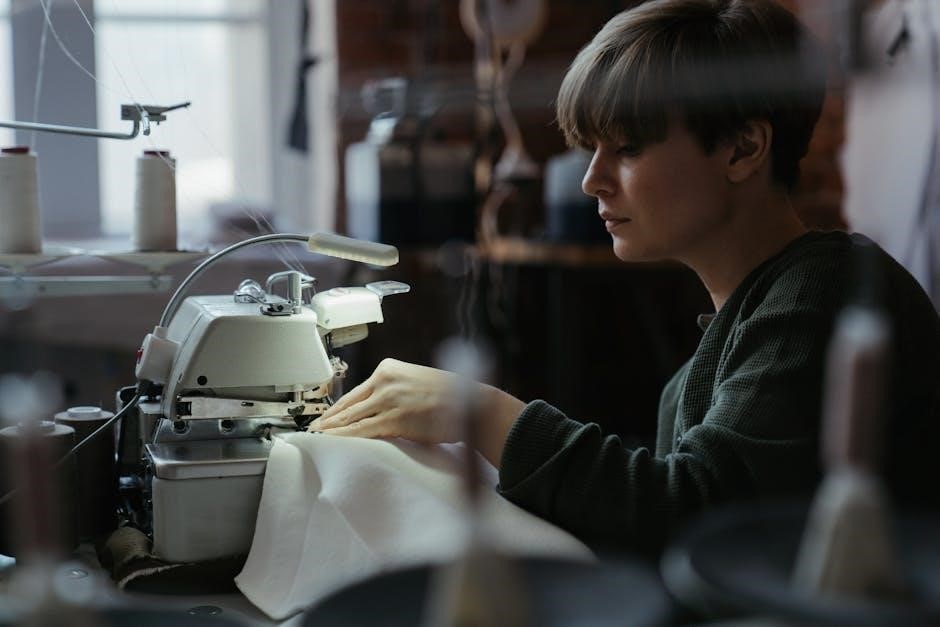
The Kenmore 12 Stitch Sewing Machine is a versatile and user-friendly appliance designed for both beginners and experienced sewists. It offers 12 built-in stitches, including essential and decorative options, making it ideal for various sewing projects. With its ultra-stitch feature, it ensures uniform stitching, providing professional-quality results. The machine’s compact design and ease of operation make it a popular choice for home use. This guide will help you understand its features, operation, and maintenance to maximize its potential.
1.1 Overview of the Kenmore 12 Stitch Sewing Machine
The Kenmore 12 Stitch Sewing Machine is a popular, versatile sewing machine designed for both beginners and experienced sewists. It features 12 built-in stitches, including straight, zigzag, and decorative options, making it ideal for a variety of sewing projects. The machine is known for its ease of use and durability, with a compact design that suits home sewing environments. It is particularly praised for its ultra-stitch feature, which ensures uniform stitching for professional-quality results. Compatible with different fabrics, from delicate silks to heavy denims, this machine is a reliable choice for crafting, repairs, and everyday sewing tasks.
1.2 Importance of the Manual for Proper Operation
The manual is essential for understanding and maximizing the Kenmore 12 Stitch Sewing Machine’s features. It provides step-by-step instructions for threading, bobbin winding, and adjusting tensions, ensuring smooth operation. The manual also details how to use the ultra-stitch feature for uniform stitches and explains the sew-by-color system. Without the manual, users may struggle with basic functions and troubleshooting. Its availability in PDF format makes it easily accessible, allowing users to download and reference it anytime. By following the manual, users can maintain the machine’s performance and extend its lifespan, ensuring optimal results for all sewing projects.
Key Features of the Kenmore 12 Stitch Sewing Machine
The Kenmore 12 Stitch Sewing Machine features 12 built-in stitches, including straight, zigzag, and decorative options. It offers ease of use, durability, and versatility. With a free-arm design for sewing cuffs and sleeves, plus a built-in needle threader, this machine is perfect for both beginners and experienced sewists.
2.1 Types of Stitches Available
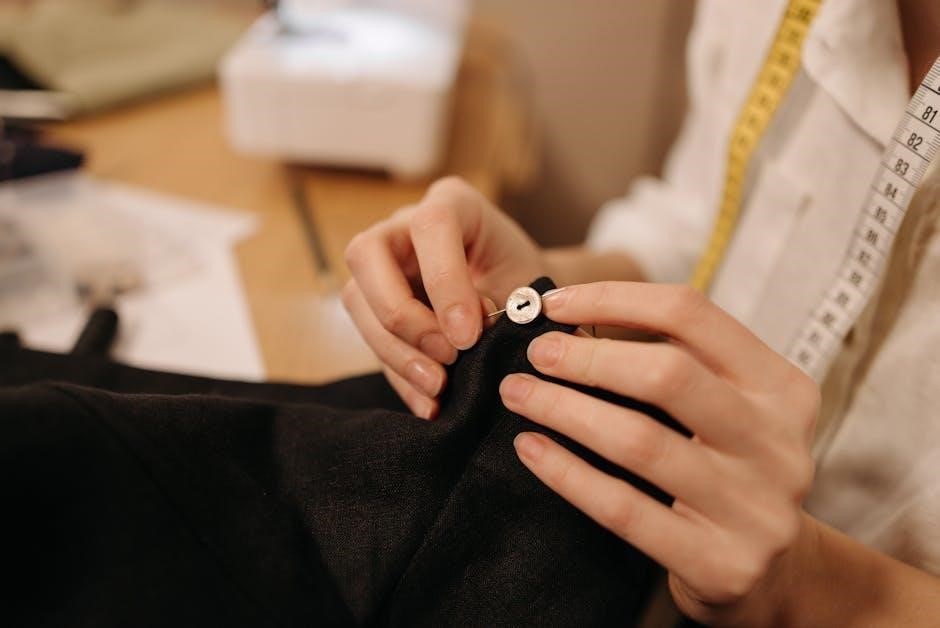
The Kenmore 12 Stitch Sewing Machine offers 12 versatile built-in stitches, including essential straight stitch, zigzag, and decorative patterns. It features stretch stitches for knits, blind hem for invisible seams, and scallop stitches for embellishments. The machine also includes a reverse stitch option for securing seams. These stitches cater to various sewing projects, from basic repairs to intricate designs. The free-arm design allows easy access for sewing cuffs and sleeves, while the built-in needle threader enhances convenience. With its diverse stitch options, this machine is ideal for both beginners and experienced sewists, supporting a wide range of fabric types and creative needs.
2.2 Ultra-Stitch Feature for Uniform Stitches
The Kenmore 12 Stitch Sewing Machine features the innovative Ultra-Stitch technology, ensuring consistent and uniform stitches every time. This advanced system automatically adjusts stitch length and tension, providing professional-quality results. It minimizes fabric bunching and pulling, making it ideal for delicate or thick materials. The Ultra-Stitch feature is particularly useful for quilting, embroidery, and heavy-duty projects, delivering precise and evenly spaced stitches. This technology enhances sewing efficiency, reducing the need for manual adjustments. With the Ultra-Stitch feature, users can achieve flawless seams and embroidery, making their sewing projects look polished and professional, regardless of skill level or fabric type.
How to Use the Kenmore 12 Stitch Manual
This section guides users through the manual, helping them understand its structure and content for optimal machine operation. It covers navigation tips and key sections to focus on for seamless sewing experiences.
3.1 Navigating the Manual for Beginners
Navigating the Kenmore 12 Stitch manual is straightforward, even for beginners. Start by reviewing the table of contents to understand the structure. Familiarize yourself with the sections on machine setup, stitch selection, and troubleshooting. Use the index to quickly locate specific topics. Pay attention to diagrams and illustrations, which provide visual guidance for threading, bobbin installation, and stitch adjustment. For new users, begin with the “Basic Operations” section to grasp essential functions. Always refer to the manual before attempting advanced techniques to ensure proper usage and avoid errors. Practice makes perfect, so start with simple projects to build confidence.
3.2 Understanding the Diagrams and Illustrations
The Kenmore 12 Stitch manual includes detailed diagrams and illustrations to help users understand machine operations. These visuals guide you through threading, bobbin installation, and stitch selection. Diagrams are labeled clearly, showing key components like the spool pins, tension dials, and stitch selectors. Illustrations often highlight proper fabric alignment and accessory usage. Compare the diagrams to your machine to ensure correct setup. Use the visuals to identify parts and follow step-by-step processes. Referencing these illustrations reduces confusion and ensures tasks are completed accurately. They are especially helpful for visual learners and those new to sewing machines.
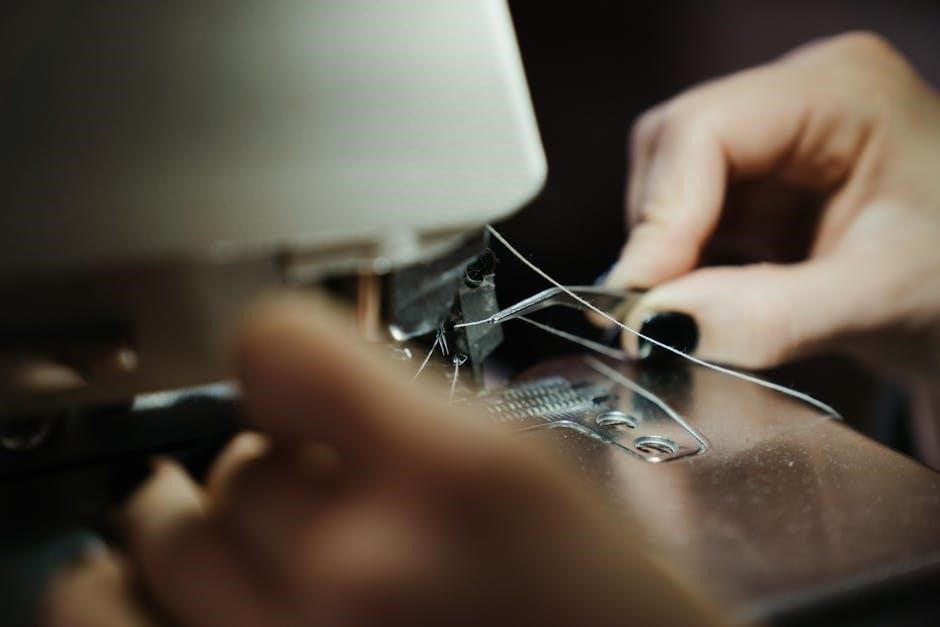
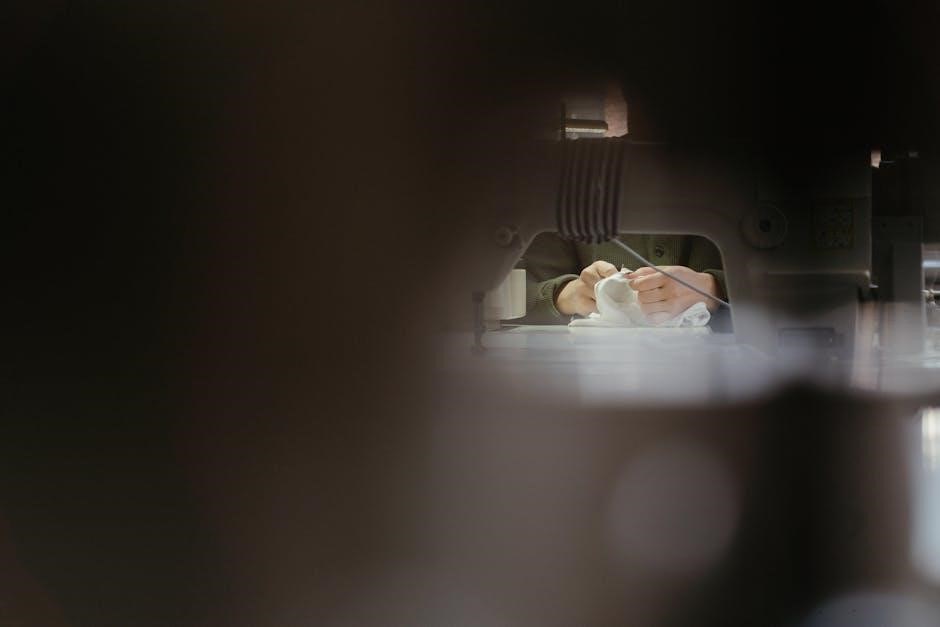
Threading the Kenmore 12 Stitch Sewing Machine
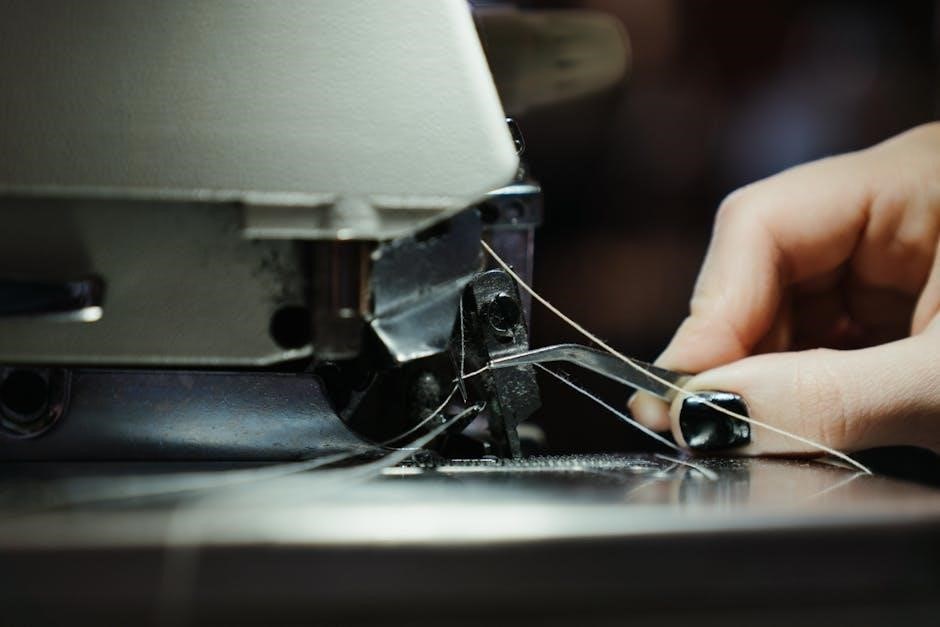
Proper threading is essential for smooth operation. Follow manual guidance to thread the machine correctly, ensuring the thread passes through the spool pin, tension discs, and take-up lever. Always check for tangles and kinks before sewing to prevent issues. Regularly inspect and clean the machine’s thread path to maintain optimal performance. Refer to the manual for step-by-step threading instructions tailored to the Kenmore 12 Stitch model.
4.1 Step-by-Step Guide to Threading the Machine
Begin by placing the spool of thread on the spool pin. Ensure it is securely seated and aligned properly.
Guide the thread through the first tension disc, located at the top of the machine, moving downward.
Pass the thread through the take-up lever, ensuring it is seated correctly.
Continue threading through the second tension disc, then bring the thread down toward the needle.
Insert the thread through the needle’s eye from front to back.
Gently pull the thread to remove any slack.
Check for tangles or kinks before sewing. Proper threading ensures smooth stitch formation and prevents machine issues.
4.2 Threading the Bobbin and Winding Yarn
Place the bobbin on the winder, ensuring it clicks into position.
Pass the yarn through the bobbin winder’s guide.
Wind the yarn by gently pressing the foot pedal.
Stop when the bobbin is evenly filled.
Cut the yarn, leaving a tail.
Insert the bobbin into the bobbin case.
Pull the yarn gently to set the tension.
Ensure the bobbin is securely seated for smooth stitching.
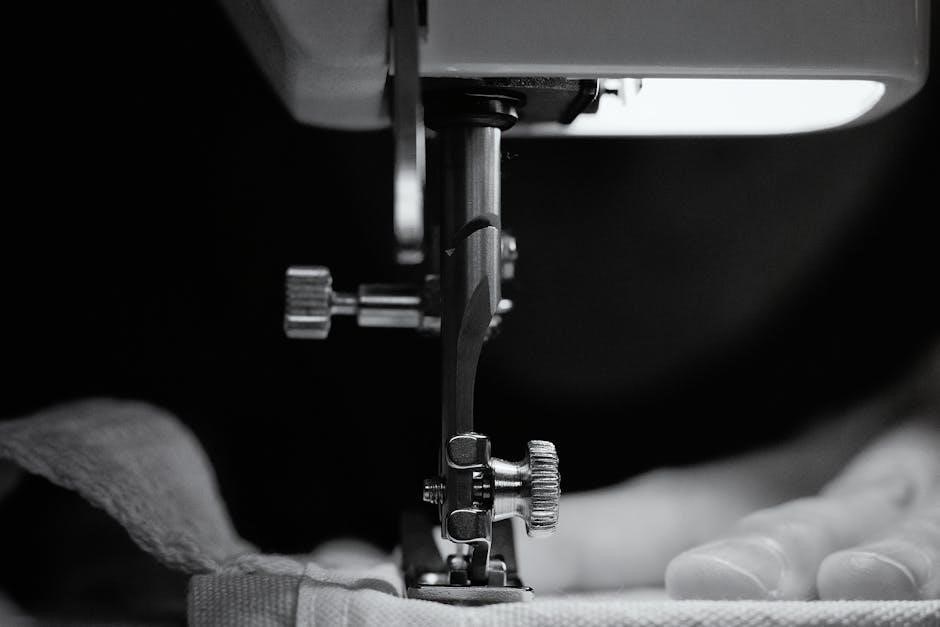
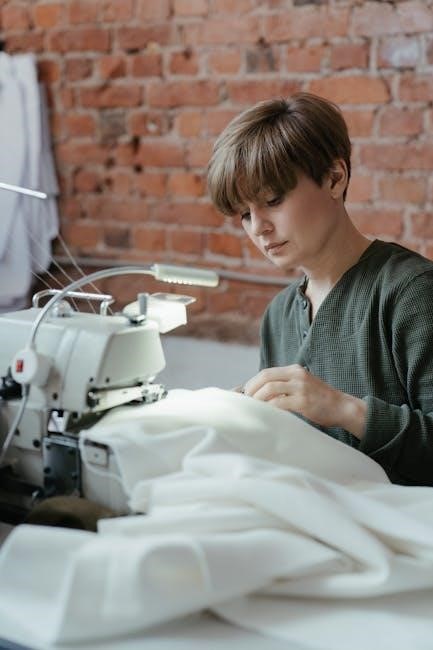
Basic Parts of the Kenmore 12 Stitch Sewing Machine
The machine features a spool pin, bobbin case, stitch selector, and tension dials. The presser foot, feed dogs, and sewing light are essential for smooth operation and visibility.
5.1 Identifying Key Components
The Kenmore 12 Stitch Sewing Machine includes essential parts like the spool pin for holding thread, bobbin case for the lower thread, and stitch selector to choose patterns. The tension dials adjust thread tightness, while the presser foot lifts to position fabric. Feed dogs move the material smoothly under the needle. The sewing light illuminates the work area, and the power switch controls operation. Understanding these components is vital for proper setup and use. Locate them in the manual’s diagrams for easy identification and operation. Proper familiarization ensures efficient sewing and troubleshooting.
5.2 Labeling and Understanding Each Part
The Kenmore 12 Stitch Sewing Machine’s parts are clearly labeled in the manual, with diagrams showing their locations and functions. Each component, such as the stitch selector, tension dials, and presser foot, is identified with numbers or letters. Understanding these labels helps users operate the machine effectively. For example, the stitch selector allows choosing from 12 stitch patterns, while tension dials control thread tightness. The presser foot lifts to position fabric, and the bobbin case holds the lower thread. Cross-referencing these labels with the manual ensures proper use and maintenance, making sewing projects easier and more efficient.
Maintenance and Care Tips
Regular cleaning with a soft brush or cloth removes lint and debris. Lightly oil moving parts to ensure smooth operation. Check the bobbin area frequently for tangled threads. Always store the machine in a dry, cool place to prevent rust; Refer to the manual for specific maintenance schedules and guidelines to keep your Kenmore 12 Stitch Sewing Machine in optimal condition and extend its lifespan.
6.1 Cleaning and Oil Requirements
Regular cleaning is essential for the Kenmore 12 Stitch Sewing Machine. Use a soft brush to remove lint and debris from the bobbin area, tension discs, and stitch plate. Lightly oil the machine’s metal parts, such as the shuttle hook and gears, to ensure smooth operation. Avoid over-oiling, as it can attract dust and dirt. Clean the exterior with a damp cloth, but never expose the machine to water. Oil the machine every 50 hours of use or as recommended in the manual. Proper cleaning and lubrication will maintain performance and extend the machine’s lifespan.
6.2 Regular Maintenance for Optimal Performance
Regular maintenance is crucial to ensure the Kenmore 12 Stitch Sewing Machine operates efficiently. Check and replace worn-out parts like needles and belts. Lubricate moving components as per the manual’s schedule. Inspect the bobbin case and tension springs for alignment. Clean the feed dogs and presser foot area regularly. Store the machine in a dry, cool place to prevent rust. Follow the recommended maintenance routine to prevent mechanical issues and extend the machine’s lifespan. Proper upkeep ensures consistent stitch quality and smooth operation, making your sewing projects easier and more enjoyable.
Troubleshooting Common Issues
Troubleshooting common issues with the Kenmore 12 Stitch Sewing Machine involves diagnosing problems like uneven stitches, thread breakage, or fabric jams. Regular maintenance and proper thread tension adjustments often resolve these issues quickly and effectively.
7.1 Resolving Tension Problems
Thread tension issues are common with the Kenmore 12 Stitch Sewing Machine. If stitches are uneven or fabric puckers, check the tension dials. Loosen or tighten them slightly until stitches are balanced. Use the manual’s guide for proper settings. Ensure the needle is correctly sized for the fabric and thread. Incorrect threading can also cause tension imbalances. Always refer to the manual for step-by-step threading instructions. Regularly cleaning the machine and using high-quality thread can prevent tension-related problems. Adjusting the bobbin tension may also be necessary for consistent stitching.
7.2 Fixing Issues with Stitches and Fabric
Stitch irregularities and fabric handling issues can be resolved by checking needle condition and alignment. A dull or bent needle may cause skipped stitches or uneven fabric feeding. Ensure the correct needle type is used for your fabric. If fabric drags, adjust the presser foot pressure or use a walking foot. For gathering stitches, verify the stitch length and width settings. Incorrect thread tension or misaligned fabric can lead to puckering. Always pre-test stitches on scrap fabric. Refer to the manual for troubleshooting guides specific to fabric type and stitch selection. Proper machine maintenance and thread quality also prevent stitch-related problems.
Accessories and Compatibility
The Kenmore 12 Stitch Sewing Machine supports various accessories like zipper feet, buttonhole attachments, and quilting extensions. Ensure all parts are compatible with the machine’s model to maintain optimal performance and functionality.
8.1 Recommended Accessories for the Kenmore 12 Stitch
Enhance your sewing experience with compatible accessories like zipper feet, buttonhole attachments, and quilting extensions. These tools expand the machine’s versatility, allowing for specialized tasks. A walking foot is ideal for heavy fabrics, while an overlock foot helps finish seams neatly. Additional accessories, such as embroidery hoops or blind hem feet, can be purchased separately. Always ensure compatibility with the Kenmore 12 Stitch model to maintain performance. Refer to the manual or manufacturer’s website for a list of approved accessories. Using genuine or compatible parts ensures optimal functionality and prolongs the machine’s lifespan. Explore these additions to maximize your sewing creativity and efficiency.
8.2 Ensuring Compatibility with Additional Parts
Ensuring compatibility with additional parts for the Kenmore 12 Stitch sewing machine is crucial for optimal performance and durability. Always check the model number and consult the manual or manufacturer’s website to confirm compatibility before purchasing. Authorized dealers and official retailers typically offer genuine parts designed specifically for your machine. Avoid using generic or third-party components that may not fit or function properly, as they can lead to operational issues or damage. By selecting compatible parts, you maintain the machine’s efficiency and extend its lifespan, ensuring smooth and consistent sewing results.
The History and Evolution of Kenmore Sewing Machines
Kenmore sewing machines began in 1913 with the first rotating hook model. Over the years, they introduced innovations like automatic stitch selection and portable designs, culminating in the 12 Stitch model, which offers versatile stitching options for home sewists, reflecting their commitment to quality and user-friendly features.
9.1 Background of the Kenmore Brand
Kenmore, a trusted household name, originated in 1913 when Sears, Roebuck, and Co; introduced its first sewing machine. Known for durability and innovation, Kenmore became synonymous with quality. Over the decades, the brand expanded its product line, incorporating cutting-edge features like automatic stitching and portable designs. The Kenmore 12 Stitch Sewing Machine reflects this legacy, blending tradition with modern functionality. Its evolution underscores Sears’ commitment to meeting the needs of home sewists, ensuring Kenmore remains a reliable choice for generations of crafters and sewers.
9.2 How the 12 Stitch Model Fits into the Product Line
The Kenmore 12 Stitch Sewing Machine is a versatile model in the brand’s extensive lineup, offering a balance between simplicity and advanced features. Designed for both beginners and experienced sewists, it bridges the gap between basic mechanical machines and high-end electronic models. With 12 built-in stitches, automatic threading, and a free-arm design, it caters to a wide range of sewing tasks. This model is positioned as a mid-tier option, providing affordability without compromising on quality. It exemplifies Kenmore’s commitment to innovation and user-friendly design, making it a popular choice for home sewing projects and a key part of the brand’s legacy.
Resources for Further Assistance
Access the official Kenmore website for the 12 Stitch manual, or explore online forums and sewing communities for troubleshooting and tips. Contact Kenmore customer support directly for personalized help.
10.1 Where to Find the Kenmore 12 Stitch Manual Online
The Kenmore 12 Stitch sewing machine manual can be easily found online through the official Kenmore website or trusted sources like ManualsLib or ManualsOnline. Visit the Kenmore website, navigate to the “Support” or “Manuals” section, and search for your specific model. Ensure you download the correct version by verifying the model number. Additionally, third-party websites specialize in hosting user manuals and may offer the Kenmore 12 Stitch manual in PDF format for free. Always download from reputable sites to avoid malware risks. If unavailable, contact Kenmore customer support for assistance.
10.2 Online Communities and Forums for Support
Online communities and forums are invaluable resources for Kenmore 12 Stitch sewing machine users seeking support. Websites like Facebook Groups, Reddit (e.g., r/sewing), and Sewing Parts Online offer platforms to connect with experienced sewists and technicians. These forums allow users to ask questions, share tips, and troubleshoot common issues. Many communities also provide access to tutorials, repair guides, and advice from seasoned professionals. Engaging with these groups can help you resolve problems, learn new techniques, and gain insights into maintaining and optimizing your Kenmore 12 Stitch sewing machine effectively. Active participation can greatly enhance your sewing experience and problem-solving skills.
The Kenmore 12 Stitch Sewing Machine is a versatile and durable tool for sewing enthusiasts. By following the manual and maintaining the machine, users can achieve professional results and enjoy a seamless sewing experience for years to come.
11.1 Summary of Key Points
The Kenmore 12 Stitch Sewing Machine offers a user-friendly design with 12 versatile stitches, ideal for both beginners and experienced sewists. The manual provides clear guidance on threading, maintenance, and troubleshooting, ensuring optimal performance. Regular cleaning and oiling are essential for longevity. Accessories like additional bobbins and presser feet enhance functionality. Online resources and forums offer further support. By following the manual and maintaining the machine, users can achieve professional-quality stitches and extend the machine’s lifespan, making it a reliable companion for all sewing projects.
11.2 Final Tips for Getting the Most Out of Your Machine
To maximize your Kenmore 12 Stitch Sewing Machine’s performance, always follow the manual’s guidelines for threading and maintenance. Experiment with different stitches for versatile projects, and use compatible accessories for specialized tasks. Keep your workspace clean and well-lit to ensure accuracy. Store the machine in a dry place to prevent rust. Regularly check for updates or additional resources online. By combining proper care, creativity, and practice, you’ll unlock the full potential of your Kenmore 12 Stitch Sewing Machine and enjoy years of reliable service.